Managing Your Accounts
You can have multiple accounts with one default account. Choose My Accounts in the Control Panel to add and manage accounts.
You are logged into the account that is marked as the default on this page.
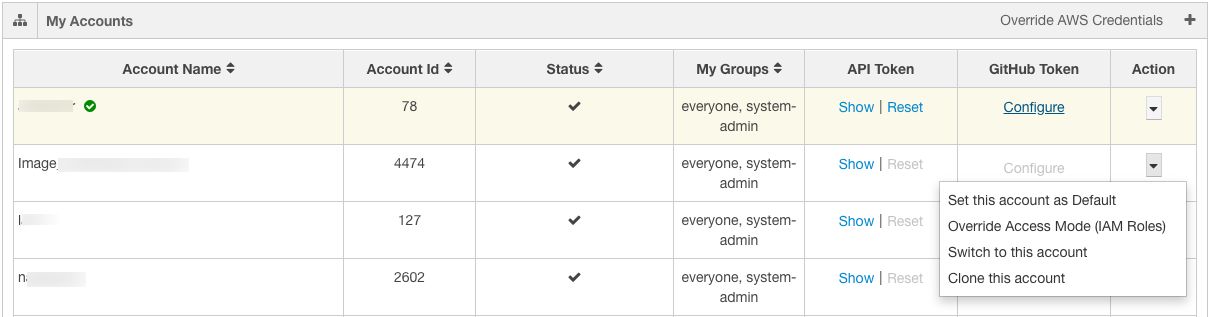
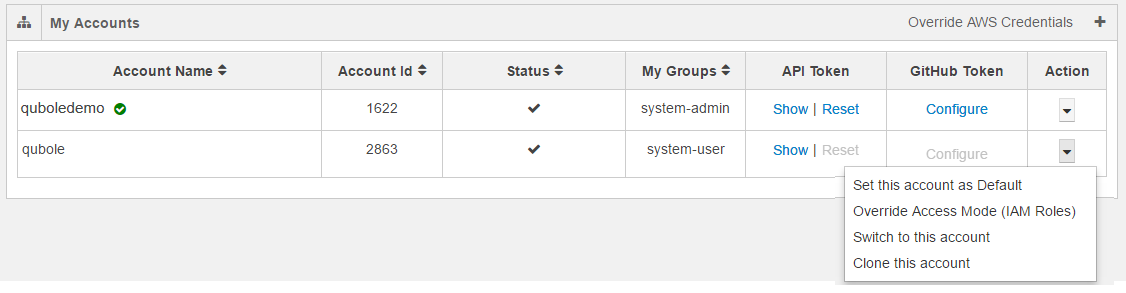
My Accounts is displayed as shown in the following figure.
Note
In the above figure, AWS specific settings such as IAM Roles are only applicable to Qubole on AWS.
Switch to a different account if you prefer to use it.
You can also click the accounts drop-down list against Action to switch to a different account and clone an account.
See the following sub-topics for more information:
- Configuring a Github Token
- Overriding an IAM-Keys-based Account (AWS)
- Overriding an IAM-Role-based Account (AWS)
- Using API Tokens
- Creating a New IAM-Keys-based Account (AWS)
- Creating a New IAM-Roles-based Account (AWS)
Configuring a Github Token
Under GitHub Token, click Configure to set a GitHub profile token in the current Qubole account. You can configure a GitHub token only in the current Qubole account or switch to the account in which you want to configure the GitHub token. See generate-git-token for more information.
After clicking Configure, a dialog to set the GitHub token is displayed. Add the token and click Save. Once a GitHub profile is configured, it is considered as a per account/per user setting. You can link notebooks to that GitHub profile after configuring the token. See GitHub Version Control for Zeppelin Notebooks for more information.
QDS encrypts GitHub tokens.
Switching Accounts
Do one of the following to switch to a different account:
Click on the drop-down next to the name of the current account near the top right of the each page:
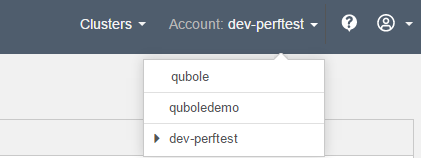
Choose the account you want to switch to.
Navigate to the My Accounts page and choose the account you want to switch to.
Overriding an IAM-Keys-based Account (AWS)
In the Action column, click the downward arrow to select Override Access Mode (IAM Keys) and Set this account as Default (only visible for a non-default account) as required.
Click Override AWS Credentials to override the AWS settings for multiple accounts.
Override AWS settings for multiple accounts is displayed as shown in the following figure.
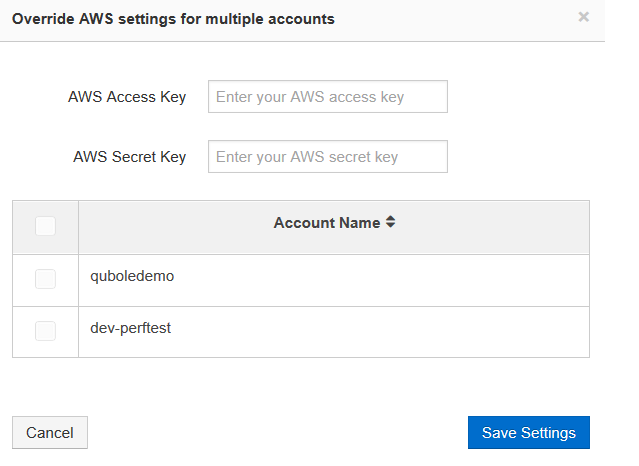
Enter the new keys in the AWS Access Key and AWS Secret Key text fields for the account that you want to change. Click Save Settings after changing the keys. Click Cancel to go back to the My Accounts page.
Overriding an IAM-Role-based Account (AWS)
Qubole also supports switching and cloning an IAM-role-based account along with overriding the account-level settings. This is an attempt to provide security by providing to grant different access privileges to users of a single IAM-Role-based account.
A cross-account authorized by IAM-based-role has its own disadvantage of using by many users. Since all users of that account use the same role and are granted with same Amazon S3 permissions. For more information, see Users and Accounts. This scenario may not be suitable in a large enterprise. To overcome this issue, Qubole provides a feature to override the cross-account’s IAM Role settings at user-level in an account. See Overriding a Cross-Account IAM Role for more information on required IAM polices.
The following figure illustrates a default IAM-role-based account that contains the clone and overriding options in the drop-down list.
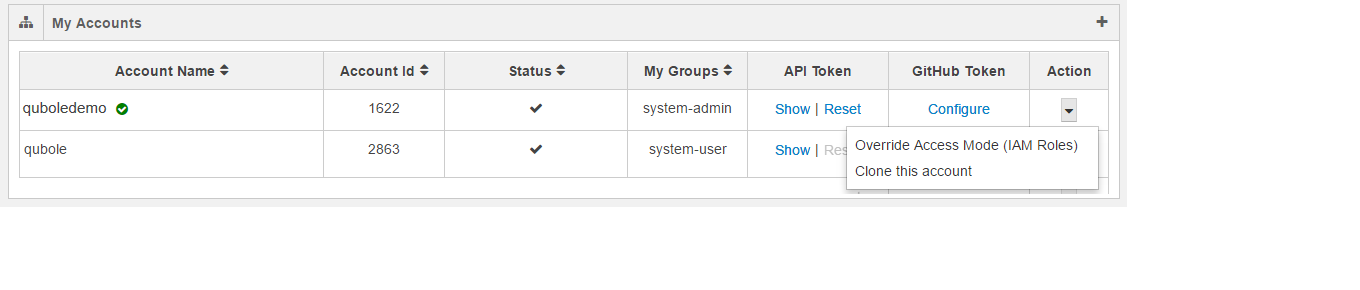
Click Override Access Mode (IAM Roles) and the dialog to override the IAM Roles account. The dialog shows a text field to enter Role ARN and a check box to enable External ID. Qubole-generated External ID can avoid the misuse of the Role-ARN from assuming IAM Role-based authorization by multiple users. If you select the check box to enable External ID, the external ID is displayed as shown in the following figure.
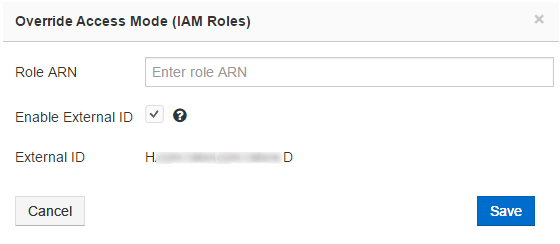
Click Save after entering the Role ARN to override the account-level IAM Role settings. Click Cancel to revert to the previous My Accounts tab.
The following figure illustrates a non-default IAM-role-based account that contains switch and clone options in the drop-down list.
Using API Tokens
Only the API token of the default account can be reset. API tokens are used to authenticate with the API. An API token is for a user per account. This implies that a user, who is part of 10 accounts has 10 API tokens. A user with a single account has one API token.
An API token can be used to schedule jobs using external schedulers such as cron but it is not required when jobs are scheduled using the Qubole scheduler. The jobs are shown by the user whose API is being used. If it is required to use a single user for all scheduled jobs, create a common user to run them.
Creating a New IAM-Keys-based Account (AWS)
Click the add icon  to create a new account. The New Account page is displayed as shown in the
following figure.
to create a new account. The New Account page is displayed as shown in the
following figure.
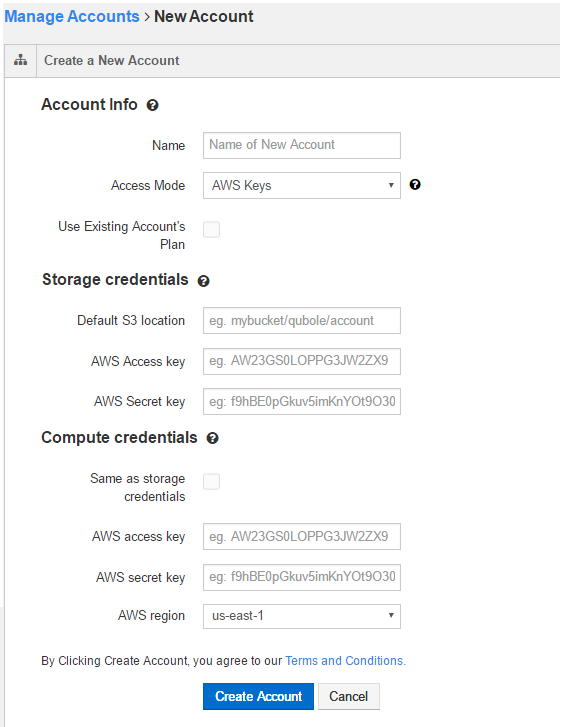
To create a new IAM-Keys-based account, perform the following steps:
- In Account Info, enter a name in the New Account Name text field.
- In the Access Mode drop-down list, by default Access Keys is selected.
- Select Use Existing Account’s Plan if you want the same as the parent account’s plan for the new account.
- In Storage credentials:
- Enter the corresponding values in Default S3 location,
- Enter the AWS Access Key.
- Enter the AWS Secret Key.
- In Compute credentials:
- Select Same as storage credentials if you prefer to use the same credentials.
- Else, enter the the AWS Access Key.
- Enter the AWS Secret Key.
- Select the AWS region from the drop-down list. Read Terms and Conditions to be aware of them.
Click Create Account to create a new account. Clicking Create Account implies that you agree to the Terms and Conditions. Click Cancel to not create the account.
Note
Use the tooltip  to know more information on each field or check box.
Creating a New IAM-Roles-based Account (AWS)
Click the add icon to create a new account. The New Account page is displayed as shown in the
following figure.
To create a new IAM-Roles-based account, perform the following steps:
In Account Info, enter a name in the New Account Name text field.
Select AWS Roles in the Access Mode drop-down list. The following figure shows a new account page that has AWS Roles as the access mode.
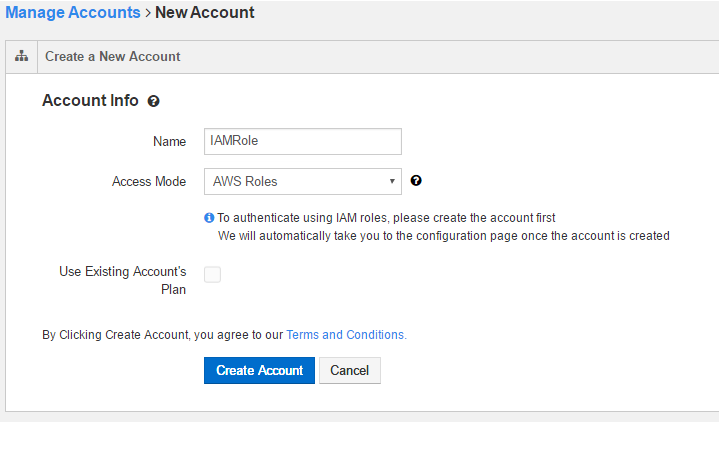
Select Use Existing Account’s Plan if you want the same as the parent account’s plan for the new account.
Read Terms and Conditions to be aware of them.
Click Create Account to create a new account. Clicking Create Account implies that you agree to the Terms and Conditions. Click Cancel to not create the account.
Note: Use the tooltip
to know more information on each field or check box.
Clicking Create Account displays the Configure Role page as shown in the following figure.
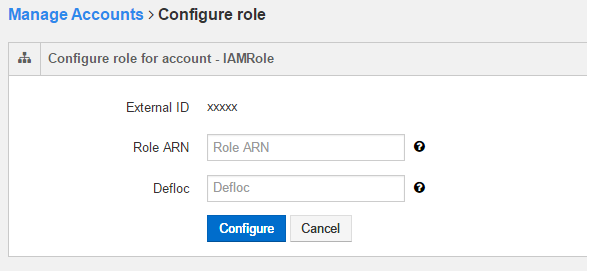
Enter the Role ARN. See Access Mode for more information on IAM Roles and Role ARN.
Enter the Amazon S3 default location in the Defloc text field.
Click Configure to create a new IAM-Roles-based account. Click Cancel to configure Role ARN and S3 default location through the Account Settings page.
Note
An IAM-Roles-based account created through the My Accounts tab does not have the default Hive tables that contain sample data.