Viewing a Schedule
In the Schedule tab, select the listed schedule that you want to see. Alternatively, if you know the ID/name of the schedule that you want to see, you can use Filter. See Filtering a Schedule more information.
Note
Press Ctrl + / to see the list of available keyboard shortcuts. See Using Keyboard Shortcuts for more information.
There is a rerun limit for schedule reruns to be processed concurrently at a given point of time. Understanding the Qubole Scheduler Concepts provides more information.
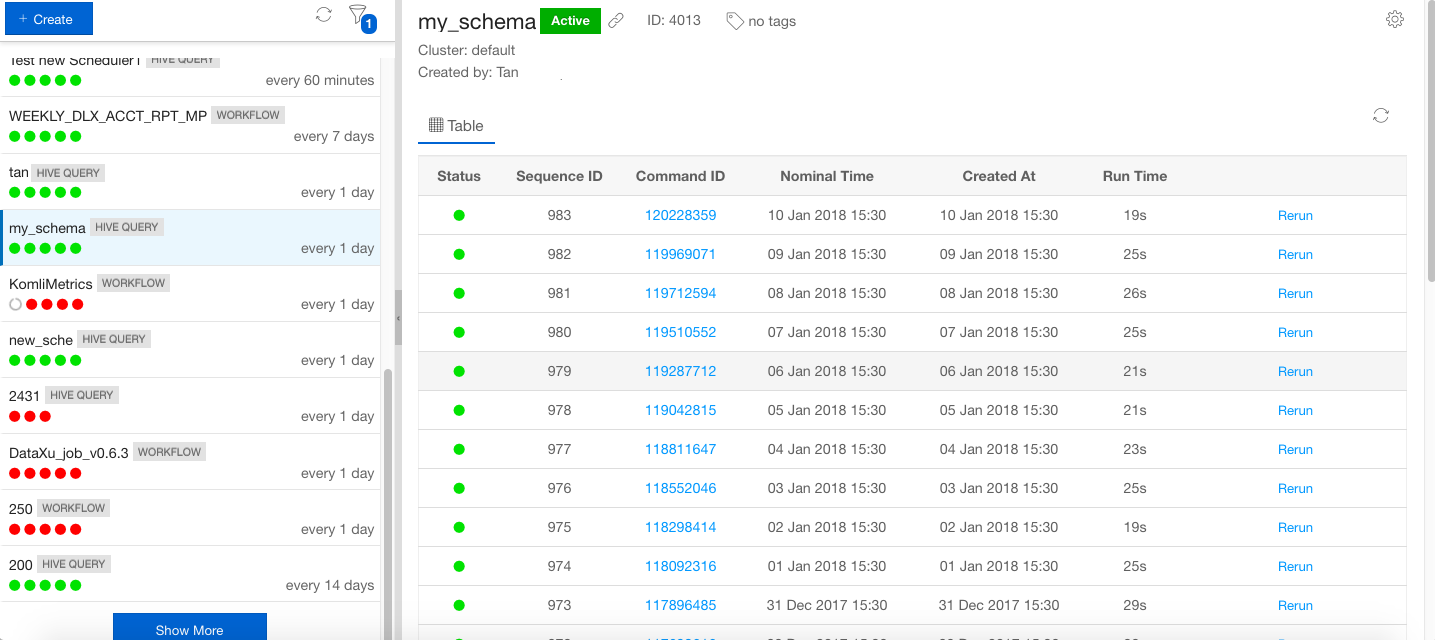
After you select a schedule from the list, the schedule details are visible in the Schedule tab as shown in the following figure.
Click the permalink icon  to see the schedule’s permalink.
In the schedule details, Scheduled schedule summary and Runs showing instances’ details.
On the top of the schedule summary, you can:
- Click the Clone button for cloning a schedule.
- Click the Edit button for editing a schedule.
- Click the Stop button for killing/stopping a schedule.
- Click the Suspend button for suspending a schedule.
Note
After you stop a schedule, you cannot resume it. However, you can suspend a schedule and resume it later.
If you click the Suspend button, a dialog to suspend with OK and Cancel buttons is displayed.
Click OK to suspend a schedule. In the schedule details page, the suspended state is shown and the suspend icon replaced with a Resume button.
Note
The default filter shows only active schedules. When a schedule is suspended, it disappears from the list of active schedules. To see the list of suspended schedules, select the status as suspended. See Filtering a Schedule for more information.
You can resume a suspended schedule any time by clicking Resume.
A dialog to resume with OK and Cancel buttons is displayed as shown below.

Select Skip Missed Instances if you want to skip instances that were supposed to have run in the past. This setting would be disabled/enabled and it is as set when the schedule was created previously. Based on the need for skipping instances, you can select it if it remains unselected.
Click OK to resume a schedule.
Note
Use the tooltip  to know more information on each field.
Viewing Schedule Actions
The Runs tab displays the schedule actions of the schedule as illustrated in the following figure.
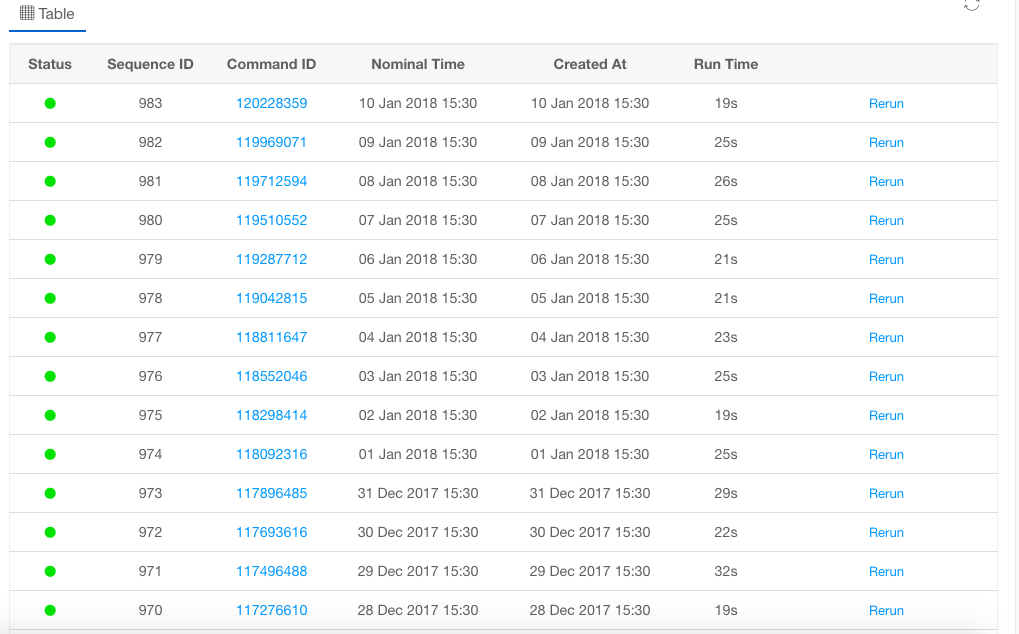
Click Rerun to run the instance again. Click Show More to see the earlier schedule actions.
Note
A _SUCCESS file is created in the output folder for successful schedule. You can set
mapreduce.fileoutputcommitter.marksuccessfuljobs to false to disable creation of _SUCCESS file
or to true to enable creation of the _SUCCESS file.
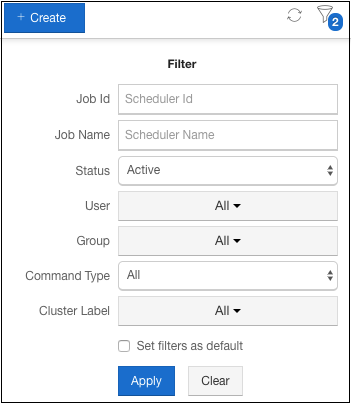
Filtering a Schedule
On the Scheduler page, click the filter icon  to limit the search result.
After you click the filter icon , the Filter dialog box appears. On the Filter dialog, you can set
the following parameters:
- Job ID
- Job Name
- Status
- User
- Group
- Command Type
- Cluster Label
After the parameters are selected, click Apply to filter the scheduled jobs.
You can select Set filters as default check box to save your desired filter parameters. You will continue to view the saved filter parameters until you change them.