Enabling the Proxy Connection
If you are connecting to the data source through a proxy server, you must provide connection details of the proxy server in addition to the endpoint, cluster label, API token, and data source name on the ODBC driver.
The following topics describe how to enable the proxy connection in Linux, Mac, and Windows:
Enabling the Proxy Connection on Linux
The keywords associated with the proxy connection are PROXY_HOST, PROXY_PORT, PROXY_USERNAME, PROXY_PASSWORD, PROXY_ENABLED, and PROXY_TYPE.
To configure a proxy server, append the DSN section in the /etc/odbc.ini configuration file with connection parameters
as described in these steps:
Create a keyword entry, PROXY_ENABLED. Enter
PROXY_ENABLED = true.Add the PROXY_HOST keyword, add the hostname or IP address of the proxy server as the keyword value. For example,
PROXY_HOST = 192.168.56.1. It is a mandatory property.Add the PROXY_PORT keyword, add the number of the TCP port that the proxy server uses to listen to client connections. For example,
PROXY_PORT = 8081. It is a mandatory property.Add the PROXY_USERNAME keyword, add the username to access the proxy server as the keyword value.
Add the PROXY_PASSWORD keyword, add the password for the username as the keyword value.
Add the
PROXY_TYPEkeyword and add a different value if you do not want the defaultHTTPvalue. These are the other supported proxy types:HTTP_1_0SOCKS4SOCKS4ASOCKS5SOCKS5_HOSTNAME
Here is a sample illustration of the DSN Setup with the proxy connection enabled.
$ cat /etc/odbc.ini
[ODBC]
# Specify any global ODBC configuration here such as ODBC tracing.
[ODBC Data Sources]
Qubole ODBC Driver DSN=QuboleODBC

[Qubole ODBC Driver DSN]
# This key is not necessary and it just describes the data source.
Description=Qubole ODBC Driver DSN
# Driver: The location where the ODBC driver is installed.
Driver=/usr/local/qubole/libquboleodbc.so
# APITOKEN: The API Token for the account as provided by Qubole.
APITOKEN=<APITOKEN>
# CLUSTER_LABEL: The label of the cluster on which queries are to be run
CLUSTER_LABEL=default
# ENDPOINT: The endpoint for the account as provided by Qubole.
ENDPOINT=https://api.qubole.com
#DSI: The data source name : Hive, Spark, or Presto.
DSI=hive
APPID=""

PROXY_ENABLED=true
PROXY_HOST=192.168.56.1
PROXY_PORT=8081
PROXY_USERNAME=username
PROXY_PASSWORD=passwd
PROXY_TYPE=HTTP
Enabling the Proxy Connection on Mac
You can enable proxy if you want to use a proxy server for your connections on Qubole ODBC Driver DSN Setup. Perform the steps below to enable the proxy connection:
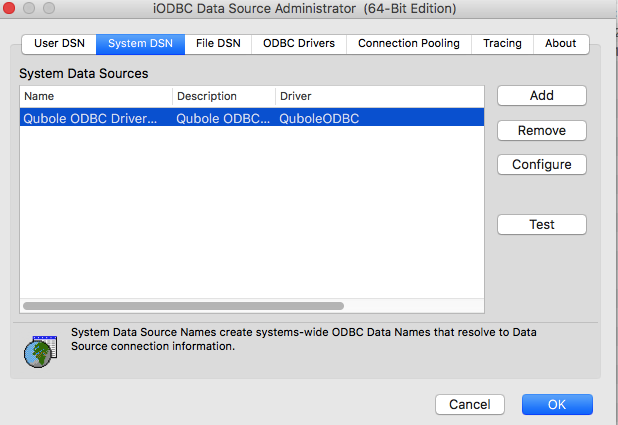
Open iODBC Administrator64 with Administrator Privileges. (
sudo /Applications/iODBC/iODBC\ Administrator64.app/Contents/MacOS/iODBC\ Administrator64)Go to System DSN and select Qubole ODBC Driver DSN.
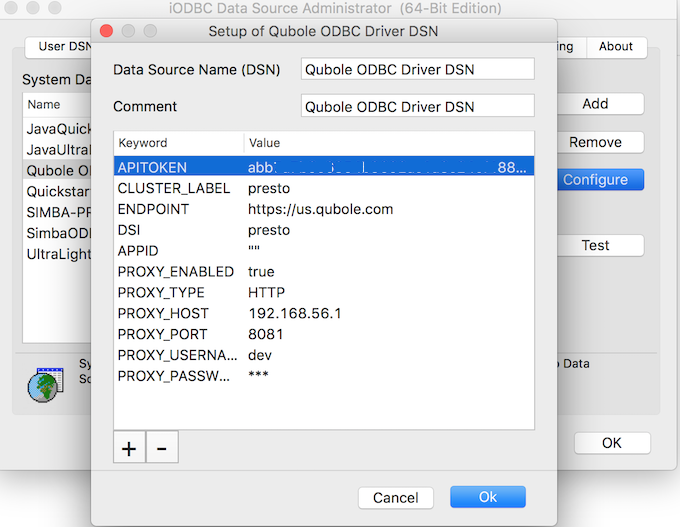
Click Configure and the dialog is illustrated here.
Enter the valid API Token.
Change the DSI as required. The supported values are:
Hive,Presto, orSpark.Create a keyword entry by clicking the + button. Enter
PROXY_ENABLED = true.Note
The keywords associated with the proxy connection are
PROXY_HOST,PROXY_PORT,PROXY_USERNAME,PROXY_PASSWORD,PROXY_ENABLED, andPROXY_TYPE.Similarly, set the
PROXY_HOSTandPROXY_PORTkeyword values, which are mandatory. Example:PROXY_HOST = 192.168.56.1andPROXY_PORT = 8081.Enter a value each for the
PROXY_USERNAMEandPROXY_PASSWORD(after adding them as keywords) if authentication is required.Add the
PROXY_TYPEkeyword and add a different value if you do not want the defaultHTTPvalue. These are the other supported proxy types:HTTP_1_0SOCKS4SOCKS4ASOCKS5SOCKS5_HOSTNAME
Here is an example of the DSN Setup with the Proxy connection enabled.
Enabling the Proxy Connection on Windows
You can enable proxy if you want to use a proxy server for your connections on Qubole ODBC Driver DSN Setup. Perform the steps below to enable the proxy connection:
Select the Enable Proxy check box. The Proxy Server Configuration dialog box is displayed.

Enter the Proxy server address and Port, which are mandatory. Example:
Server: 192.168.56.1andPort: 808.Enter a Proxy Username and Password if authentication is required.
Choose a different Proxy Type if you do not want the default HTTP. These are the other supported proxy types:
HTTP_1_0
SOCKS4
SOCKS4A
SOCKS5
SOCKS5_HOSTNAME