Qubole Step (5)
Note
If you are following the detailed steps, the steps below follow on from Steps 1-4 in the Azure Setup.
Step 5 (QDS): Configure QDS Account Settings
Step 5a: Add the storage account, container and storage keys
Log in to the QDS UI and navigate to Account Settings. On the Account Settings page, scroll down to Storage Settings.
You need to enter information for one of Azure Blob storage or Azure Data Lake storage or Azure Data Lake Gen 2 storage with keys or Azure Data Lake Gen 2 storage with Azure AD (tokens).
For Azure Blob storage:
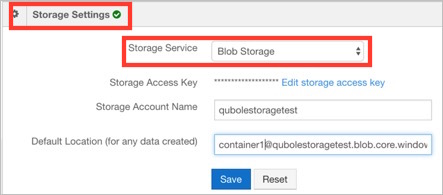
Add the Storage Account Name, container (Default Location) and a Storage Access Key from Step 4.
OR: For Azure Data Lake:
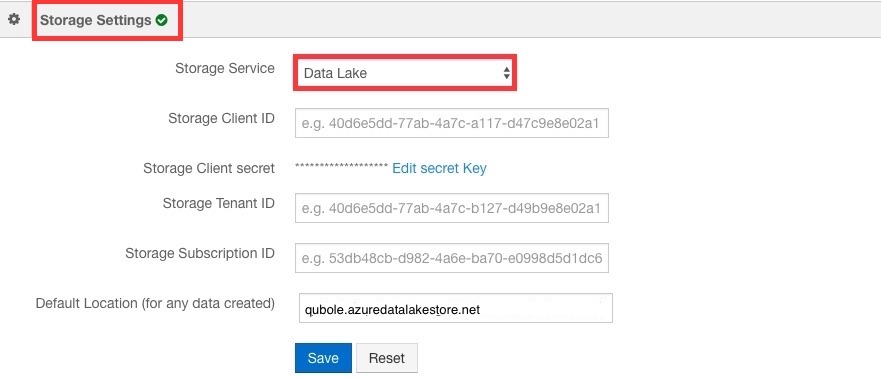
For Storage Client ID, Storage Client Secret, and Storage Tenant ID, use the values you saved in Step 1b and Step 1c. For this quick start, you are using the same values as for Compute Settings (Step 5b), though you may want to use different values later. Add the default container (Default Location) for any data created via QDS.
OR: For Azure Data Lake Gen 2 with keys:
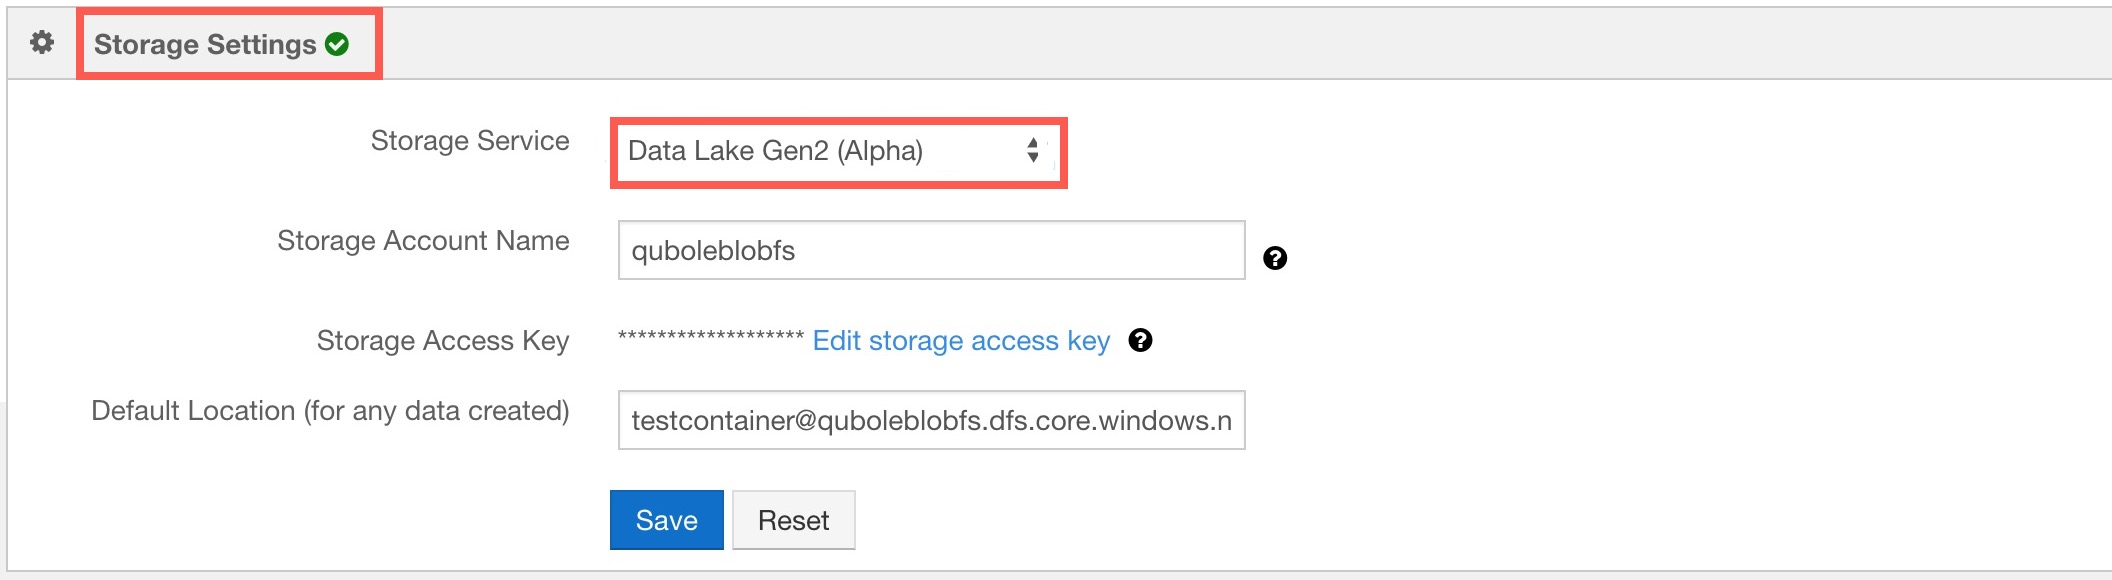
Add the Storage Account Name, default container (Default Location) and a Storage Access Key from Step 4.
OR: For Azure Data Lake Gen 2 with Azure AD (tokens):
Note
Contact Qubole Support to enable this capability.
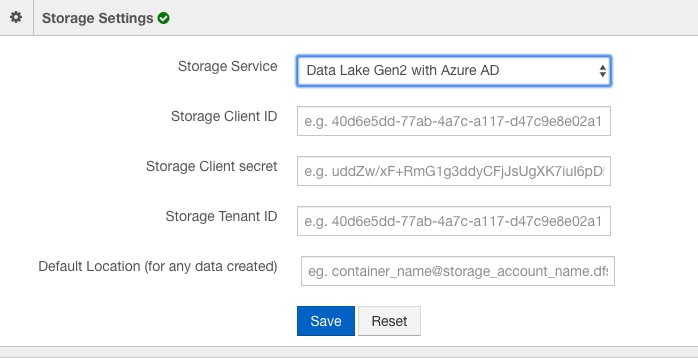
Choose Data Lake Gen 2 with Azure AD. For Storage Client ID, Storage Client Secret, and Storage Tenant ID, use the values you saved in Step 1b and Step 1c. For this quick start, you are using the same values as for Compute Settings (Step 5b), though you may want to use different values later. Add the default container (Default Location) for any data created via QDS.
Step 5b: Add the Client ID, Authentication Key and Tenant ID
Step 5c: Specify the Default Resource Group
You need to specify the default Azure Resource Group in which QDS will bring up your clusters. Proceed as follows:
Set the Default Resource Group field set to Use Existing.
Choose the Resource Group you specified in Step 1e:

Click Save.
You have configured your QDS account. Now proceed to updating your clusters.