Setting Up AD Authentication and Data Authorization for Azure Gen 2 Storage
Qubole on Azure supports Azure Active Directory (AD) for both user access control and data authorization. With these in place, you can on-board users to Qubole on Azure and have these users retain their existing Azure data-access policies directly in QDS. This is possible because when a user authenticates with QDS via AD, QDS retains the OAuth token returned by Active Directory for the duration of the QDS user’s session, and uses this when executing any command via the API.
AD integration with QDS can deployed in two ways:
- AD Authentication only. In this case, AD is only used for Single Sign-On (SSO).
- AD Authentication and data authorization. In this case the default storage location for data output from QDS must be set to ADLS Gen2.
Setting Up AD Authentication Only
Create a Qubole Support ticket asking Qubole to enable AD authentication for your QDS account and add a new control for the email domain users who will be accessing the platform via AD.
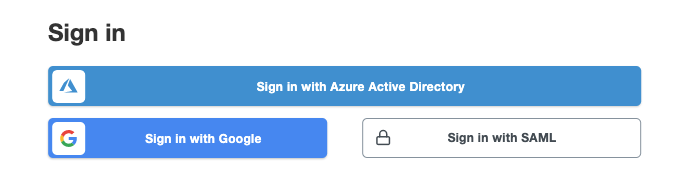
Once this is done, AD authentication is in effect for your QDS account, and SSO is enabled. Users should choose the Sign in with Azure Active Directory option when they log in to QDS:
Setting Up AD Authentication and Data Authorization
Create a Qubole Support ticket asking Qubole to enable AD authentication for your QDS account and add a new control for the email domain users who will be accessing the platform via AD.
In the Azure portal, navigate to the Qubole App registration and ensure that it has the following API permissions set: *
User.Readon Azure Active Directory Graph *User_impersonationon Azure Storage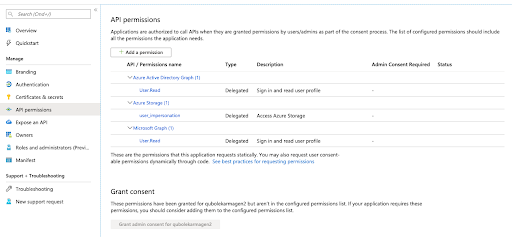
Click on the Grant consent… button in the API Permissions window to make sure that admin permissions have been granted to the Qubole App:

Under Authentication, set the reply URL for the app registration:
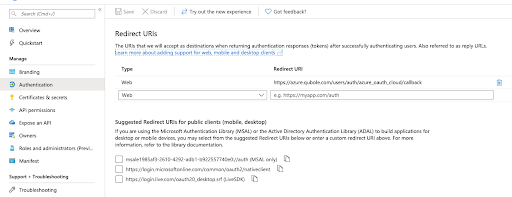
Note
The type is Web and the URL should be set to https://azure.qubole.com/users/auth/azure_oauth_cloud/callback
Authorized users should now be able to sign in to QDS using Azure AD authentication.
Log in to the QDS UI using the Sign in with Azure Active Directory option:
Navigate to the Account Settings page and scroll down to Storage Settings:
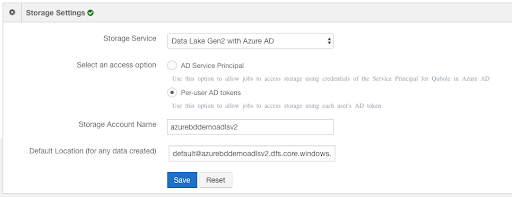
You should now see Data Lake Gen2 with Azure AD as a Storage Service option in the drop-down list. When you select it, you also need to select either:
- AD Service Principal - select this for shared data access policies; OR
- Per-user AD tokens - select this for per-user data access policies.
After making your selection, click Save. QDS should now be ready to start up a cluster. All jobs run via the API will now use the user’s or the Service Principal’s token, depending on which option you selected.