Using the new Package Management UI
Qubole has redesigned the Package Management UI called as Environments with certain new features.
Note
The new Package management UI is not enabled by default. Create a ticket with Qubole Support to enable the new Package Management UI.
Navigate to Control Panel >> Environments page to launch the new Package Management UI.
You can manage Python and R packages in Spark applications. QDS automatically attaches an environment with Python version 3.7 to an Airflow 1.8.2 cluster.
Note
Package management with Python 3.5 or 3.7 is supported on Airflow clusters.
From the new Package Management UI, you can perform the following tasks:
Creating an Environment
Navigate to the new Environments page.
Click on the +New button on the left navigation pane. The create environment dialog appears as shown below.
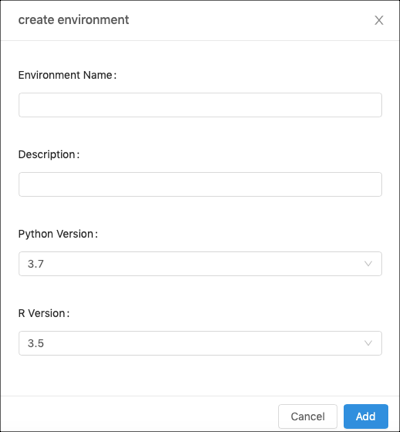
Enter a name and description for the environment in the respective fields.
Select the appropriate Python Version and R Version from the drop-down lists.
Click Add. A new environment is created and displayed as shown below.
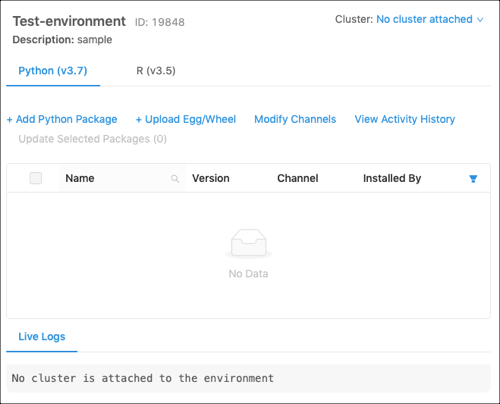
A newly created environment by default contains the Anaconda distribution of R and Python packages and a list of pre-installed Python and R packages. For more information about viewing packages, see Viewing Packages.
Attaching a Cluster to an Environment
You can attach environments to Spark and Airflow clusters. For Spark clusters, a Conda virtual environment is created for Python and R environments.
You can attach an environment only to a cluster that is down. You can attach only one cluster to an environment.
Click on the Cluster drop-down list on the top-right corner of the Environments page, and select the appropriate cluster.

If you want to detach a cluster, select Detach Cluster from the Cluster drop-down list.
In the Spark cluster, Python and R Conda environments are located in /usr/lib/envs/ (existing package management) or
in /usr/lib/environs/ (new package management). The spark.pyspark.python configuration in /usr/lib/spark/conf/spark-defaults.conf
points to the Python version installed in the Conda virtual environment for a Spark cluster.
In a Spark notebook associated with a cluster attached to the package management environment, set these configuration parameters in its interpreter settings to point to the virtual environment:
Set
zeppelin.R.cmdtocluster_env_default_rSet
zeppelin.pyspark.pythontocluster_env_default_py
You can also attach an environment with Python 3.7 to a cluster running Airflow 1.8.2; any previous environment must be detached from the cluster first. For more information, see Configuring an Airflow Cluster.
If you detach a Python 3.7 environment from an Airflow 1.8.2 cluster, you must attach another Python 3.7 environment or the cluster will not start.
Adding Python Packages
You can add Python packages either from Conda or PyPI.
In the environment, select the Python tab, and click + Add Python Package tab.
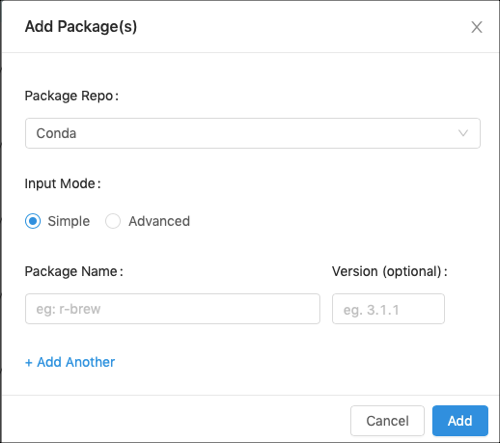
The Add Package(s) dialog appears as shown below.
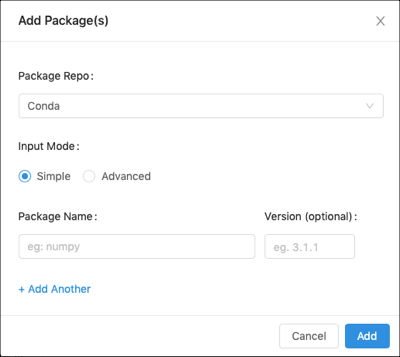
Select the Conda or PyPI as Package repo.
Select the input mode as Simple or Advanced.
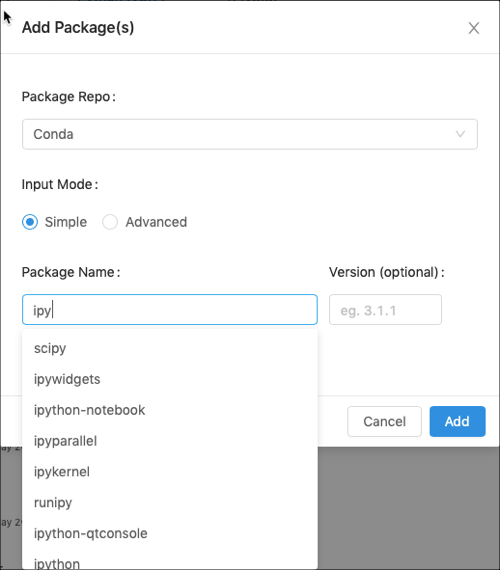
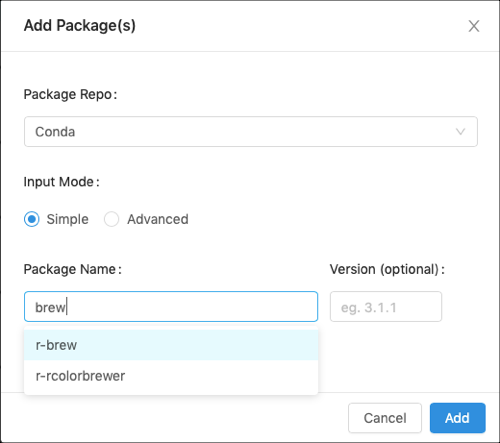
The Simple mode is the default input mode. Add the name of the package in the Name field. As you type the name, an autocomplete list appears and you can select the package name. The version is optional field and it can be incremental as shown below. If you just mention the package name, then the latest version of the package is installed.
Note
If you upgrade or downgrade a Python package, the changed version is reflected only after you restart the Spark interpreter. Interpreter Operations lists the restart and other Spark interpreter operations.
In the Advanced mode, the autocomplete list does not appear. Enter the package name. You can add multiple names of packages as a comma-separated list. You can also mention a specific version of the package, for example,
numpy==1.1. For downgrading, you can just mention the version number to which you want to downgrade. If you just mention the package name, then the latest version of the package is installed.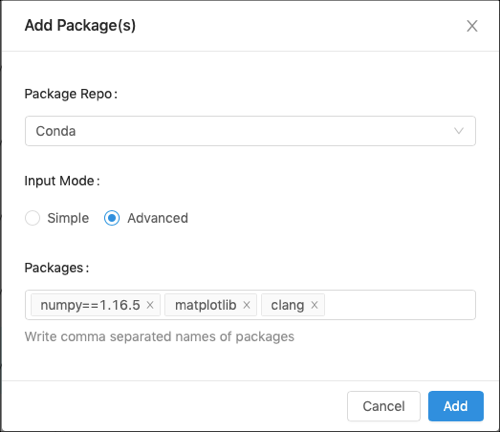
Click Add. The packages are marked as Pending Packages.
Start the cluster for the installation to complete. After the installation is complete, the packages are listed in the Name column as User mentioned in the Installed By column. If the cluster is not attached to the environment, attach a cluster and start the cluster to complete the installation.
Uploading Egg or Wheel Packages
You can add Egg or Wheel packages in the Python Conda environment.
Note
This feature is not enabled by default. Create a ticket with Qubole Support to enable this feature.
In the environment, select the Python tab.
Click +Upload Egg/Wheel.
The Upload Package dialog appears as shown below.
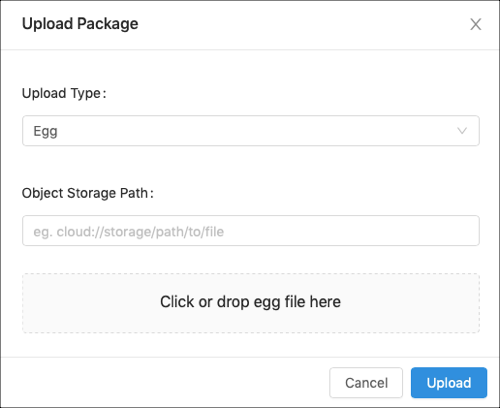
Select Egg or Wheel from the Upload Type drop-down list.
Perform one of the following steps:
Depending on whether the package is on object storage or local storage, enter the object storage path or path in the local storage.
Click to browse for the file, or drag and drop the file.
Click Upload. The packages are marked as Pending Packages.
Start the cluster for the installation to complete. After the installation is complete, the packages are listed in the Name column as User Package Dependency mentioned in the Installed By column. If the cluster is not attached to the environment, attach a cluster and start the cluster to complete the installation.
Adding R Packages
You can add R packages either from Conda or CRAN.
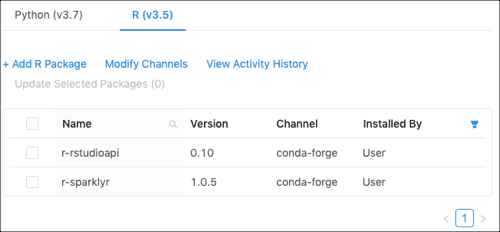
In the environment, select the R tab, and click + Add R Package tab.
The Add Package(s) dialog appears as shown below.
Select the Conda or CRAN as Package repo.
Select the input mode as Simple or Advanced.
The Simple mode is the default input mode. Add the name of the package in the Name field. As you type the name, an autocomplete list appears and you can select the package name. The version is optional field and it can be incremental as shown below. If you just mention the package name, then the latest version of the package is installed.
In the Advanced mode, the autocomplete list does not appear. Enter the package name. You can add multiple names of packages as a comma-separated list. You can also mention a specific version of the package, for example,
r.dbi==2.3.2. For downgrading, you can just mention the version number to which you want to downgrade. If you just mention the package name, then the latest version of the package is installed.
Click Add. The packages are marked as Pending Packages.
Start the cluster for the installation to complete. After the installation is complete, the packages are listed in the Name column as User mentioned in the Installed By column. If the cluster is not attached to the environment, attach a cluster and start the cluster to complete the installation.
Viewing Packages
You can view the user installed packages, system installed packages, and user package dependencies.
Select Python or R tab.
Click the filter icon in the Installed By column as shown below.
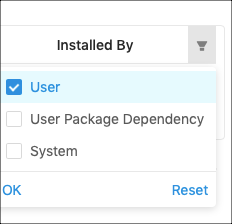
Select the type of packages you want to view, and click OK.
The list of packages are displayed as shown below.
Modifying Channels
You can modify the channels for Conda, PyPI, and CRAN packages to add custom channels, and install the packages from these custom channels.
Note
This feature is not enabled by default. Create a ticket with Qubole Support to enable this feature.
Select Python or R tab.
Click Modify Channels.
The Modify Channels dialog is displayed as shown below.
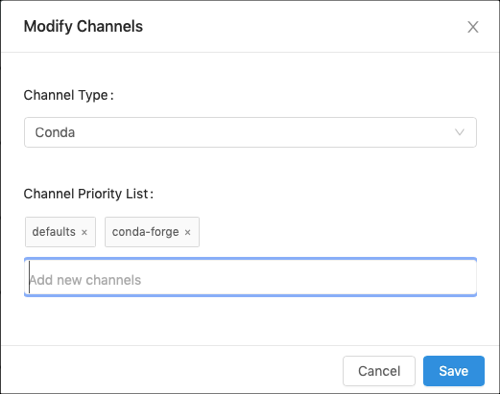
Select Conda, PyPI, or CRAN from the Channel Type drop-down list.
Enter the name of new channels in the Channel Priority List.
The leftmost channel has the highest priority while the rightmost channel has the least priority.
Click Add.
Viewing Activity History
You can view the activity history for each environment.
Select Python or R tab.
Click View Activity History.
The Activity History is displayed as shown below.
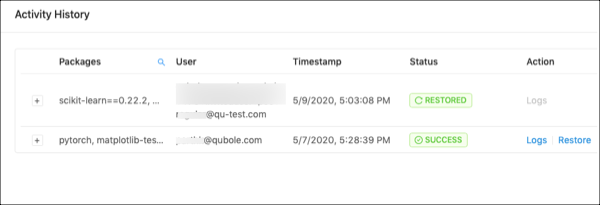
Expand the package to view details.
To restore an environment to a previous success state, click Restore.
To view logs, click Logs.
Updating the Packages
You can update the installed packages by performing the following steps:
Select Python or R tab.
Select the required package from the table as shown below.
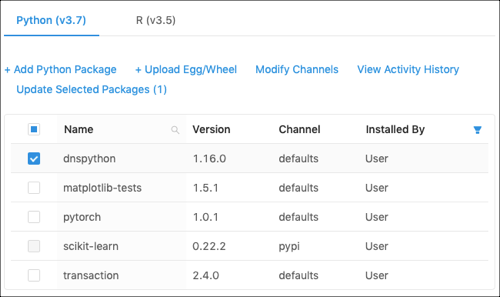
Click Update Selected Packages. The Update Package(s) dialog appears as shown below.
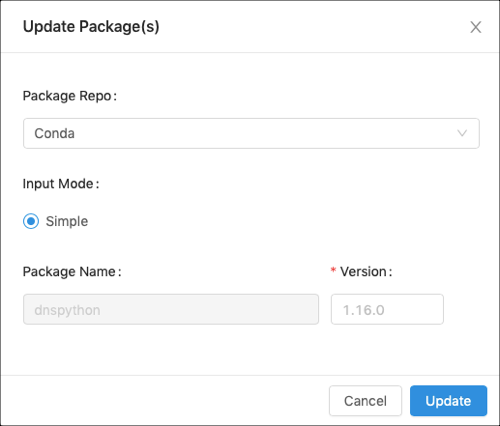
Select the appropriate Package Repo and enter the version details.
Click Update.
Editing an Environment
You can edit the name and description of an environment.
From the left navigation pane, hover the mouse on the required environment.
Click on Gear (settings icon) as shown below.
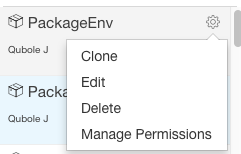
Click Edit from the menu.
The edit environment dialog appears as shown below.
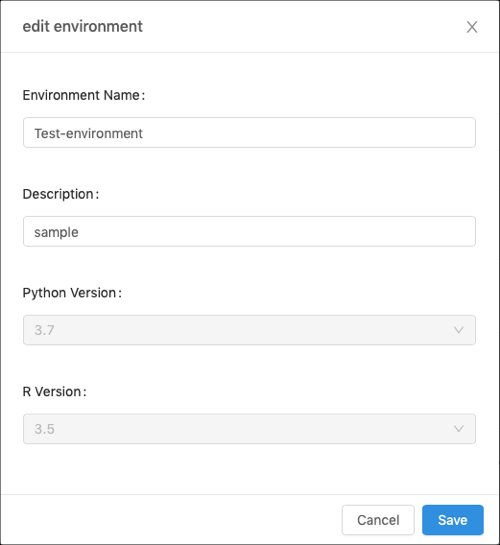
Edit the values and click Save.
Cloning an Environment
When you want to use the same environment on a different cluster, clone it and attach it to that cluster. You can attach an environment to only one cluster.
From the left navigation pane, hover the mouse on the required environment.
Click on Gear (settings icon) as shown below.
Click Clone from the menu.
The clone environment dialog appears as shown below.
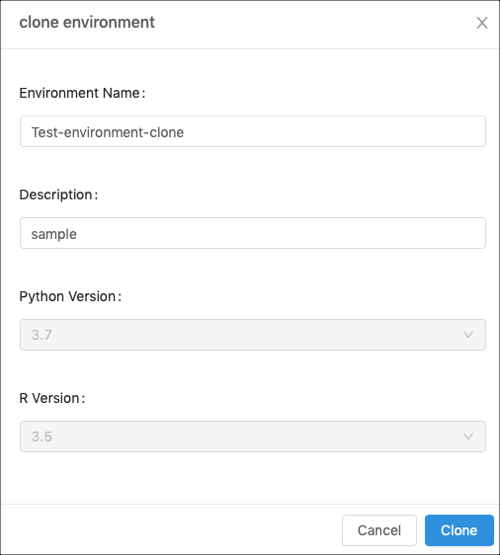
By default, a suffix to the name that is
<environment name>-cloneis added in the Name field. You can retain that name or change it. You can also change the description. You cannot change application versions.Click Clone.