Through CI/CD (GitHub, GitLab, or Bitbucket)
Configure GitHub, GitLab, or Bitbucket as Repository
Prerequisite
To select Git (GitHub or GitLab) or Bitbucket as the deployment repository for DAGs, you should first configure the Version Control Settings on the Account Settings page. For more information on how to configure GitHub, GitLab, or Bitbucket version control settings, see Configuring Version Control Systems.
Configuration
Follow the instructions below to manage your Airflow DAGs through Git or Bitbucket:
Navigate to Home > Cluster.
On the Clusters page, click Edit for the Airflow cluster to change its deployment repository.
On the cluster details page, select Advanced Configuration tab.
From the Deployment Source drop-down list (under the AIRFLOW CLUSTER SETTINGS section), select GIT Repository.
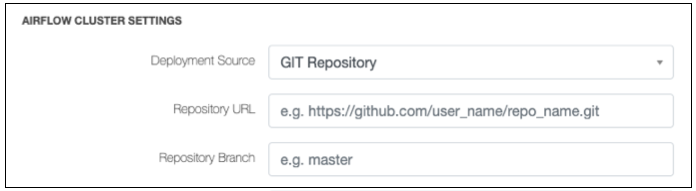
Enter repository location in the Repository URL field.
Enter the branch name in the Repository Branch.
To create a new Airflow cluster or edit an existing one, click Create or Update and Push respectively.
You have successfully configured Git (GitHub or GitLab) or Bitbucket as the deployment repository for Airflow DAGs.
Create a Configuration File
After you configure the repository, you require the configuration file (.yaml) in your repository to enable a set of
instructions for the deployment.
Create a configuration file (
.yaml) with this name -qubole-airflow.yamland ensure that it has all the parameters defined as shown in the example below. Presence of this file helps to pass the Config Validation during the deployment.Specify the
requirementsparameter in the configuration file (.yaml). It is the relative path to the file with the list of requirements. It installs the packages through the Package Installation and clones your git repository on the cluster through Cloning Repository during the deployment.Specify the
scriptsparameter that helps in completion of the Running Scripts during the deployment.scriptsis an array of simple commands. They are run before copying the DAGs and plugins.Specify the
dagsparameter to provide the relative path to the DAG files. This folder of DAG files is recursively copied to the DAGs folder on the cluster through Copy Dags during the deployment.Specify the
pluginsparameter to provide the relative path to the plugin files. This folder of plugin files is recursively copied to the plugins folder on the cluster through Copy Plugin during the deployment.
Note
sync-directory and dags are the mandatory parameters.
Example
steps:
  requirements: tempdir/requirements.txt
  scripts:
    - 'ls'
    - 'python setup.py'
  sync-directory:
    dags: testproject/dags
    plugins: testproject/plugins
Deploy DAGs and Plugins using GitHub, GitLab, or Bitbucket as Repository
After you create the configuration file, follow the instructions below to start deployment from Git:
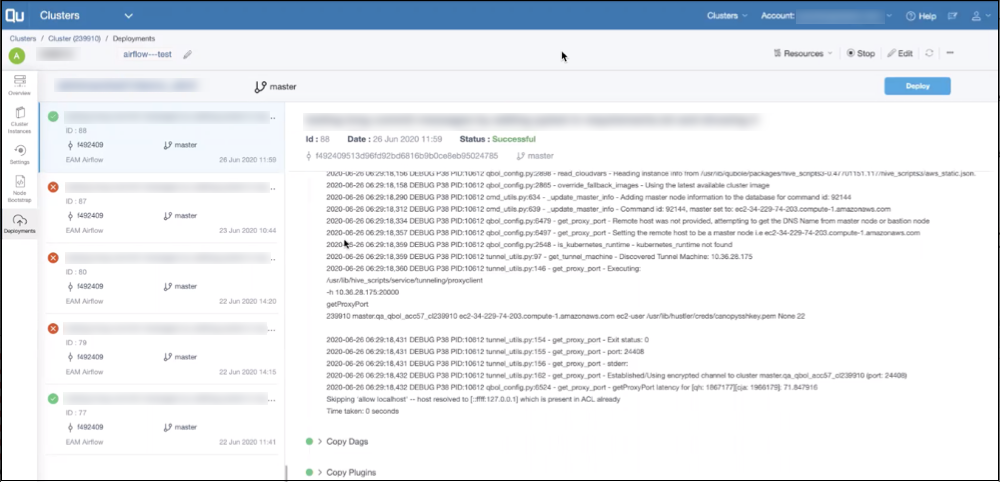
On the cluster details page, select Deployment tab at the left pane.
Important
To start deployment from GitHub, GitLab, or Bitbucket, the respective Airflow cluster must be up and running.
Click Deploy. A popup window appears to ask you for confirmation.
Click OK. QDS starts deployment.