Configuring the Qubole Data Service
Prerequisites
An AWS account and relevant permissions to create roles and policies.
An Amazon S3 bucket for a default storage location.
A QDS account.

Click the respective tab (below) to follow the instructions under each of these steps.
Copy Credentials from QDS
On the Home page, click Account Settings under Control Panel.
Scroll down to the Access Settings section.
From the Access Settings section, select IAM Role.
Copy the Trusted Principal Account ID and External ID.
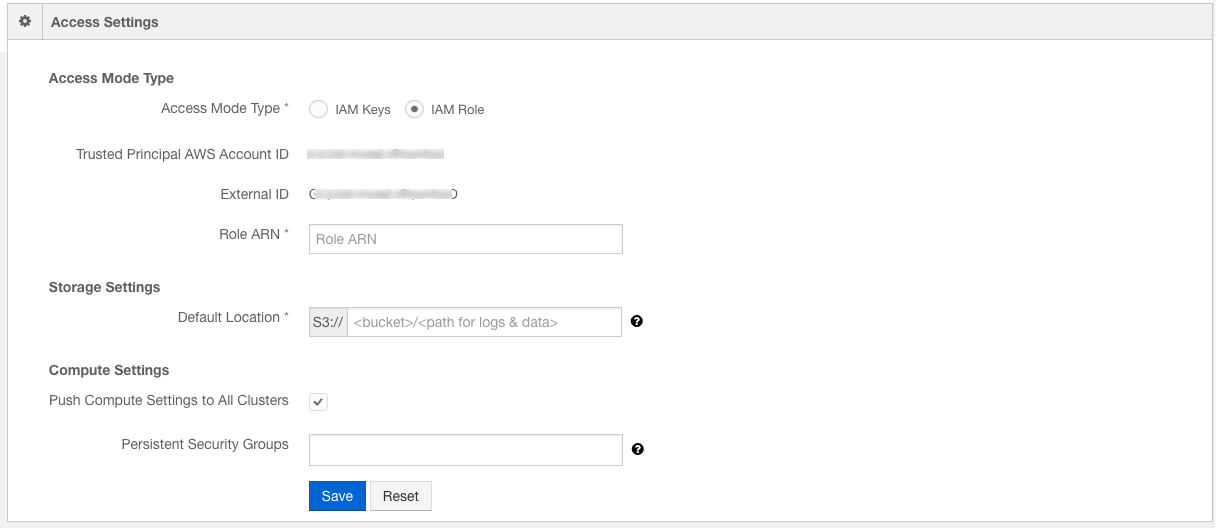
Create IAM Policies on AWS
On the AWS Console, enter IAM in the search bar and click Enter. The Identity and Access Management Dashboard page appears.
On the left pane, click Policies.
On the right pane, click Create policy. This opens on a separate page.
On the Create policy page, click the JSON tab.
Copy and paste a JSON file from this page.
Click Review policy.
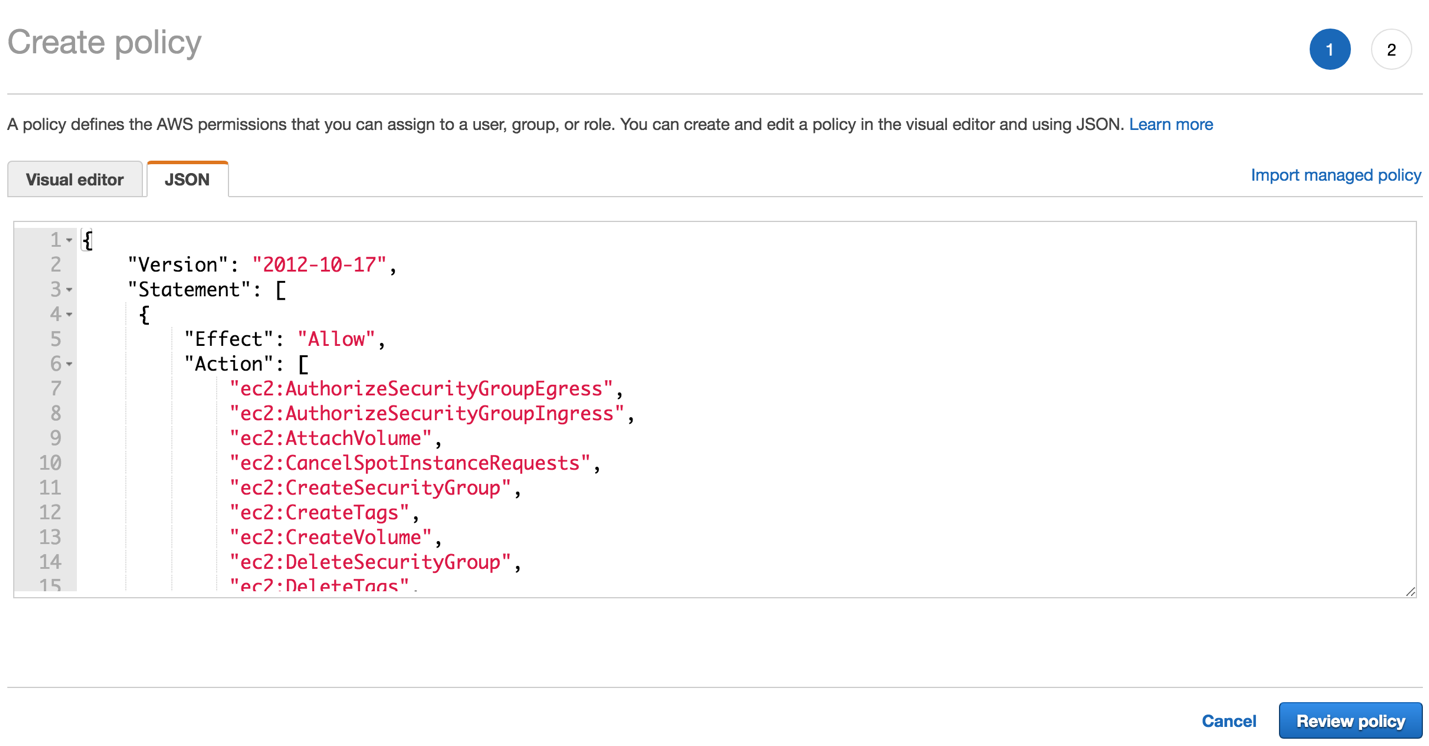
In the Name field, enter a name for the policy.
Click Create policy. This creates your Amazon EC2 policy.
Repeat steps 2 through 7 using this JSON code to create the Amazon S3 policy.
Note
Remember to replace <bucketpath> in the JSON text to match your Amazon S3 bucket name (from the prerequisites).
Create IAM Roles on AWS
On the left pane, click Roles.
On the right pane, click Create role. The Create role page appears.
Click AWS service and select EC2. Click Next: Permissions.

In the search field beside Filter policies, search for Qubole, and add both the policies you created.
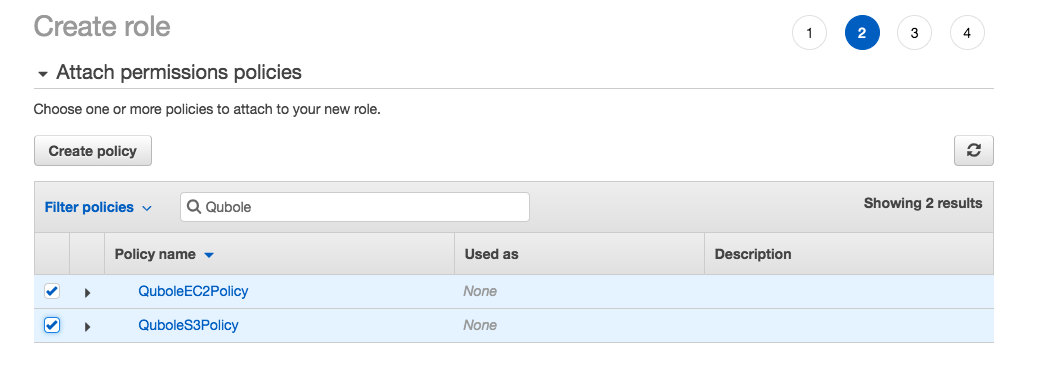
Click Next: Tags.
Add any tags required (optional) and click Next: Review.
Enter a role name and click Create role.
On the Roles page, select the newly created role.
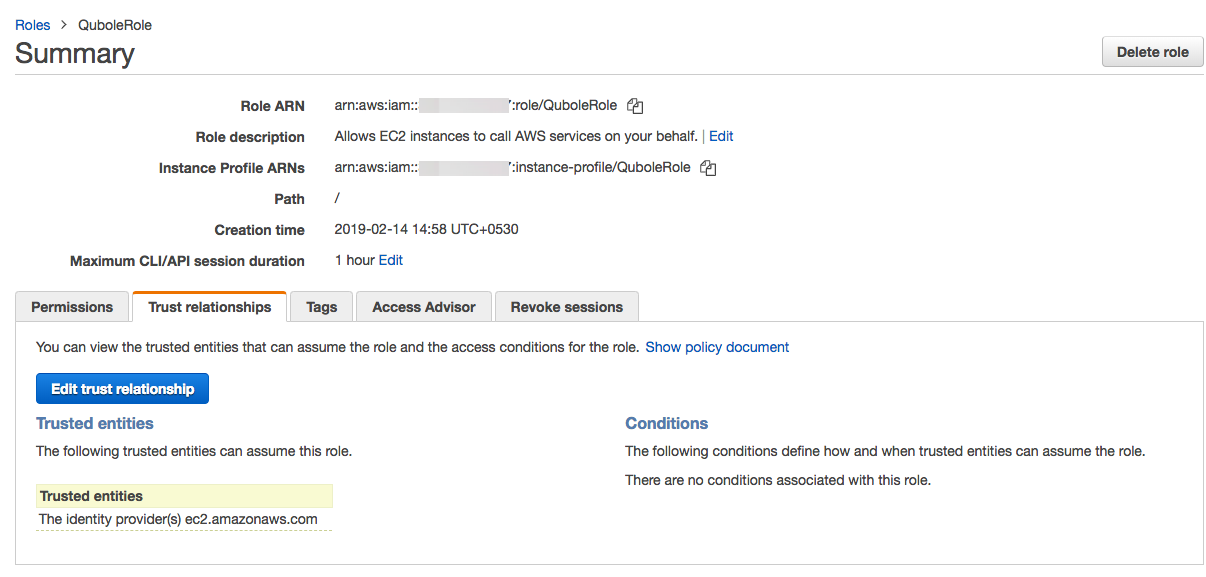
Click the Trust Relationship tab and then click Edit trust relationship.
Copy and paste this JSON text.
Note
Remember to replace <AccountID> and <ExternalID> in the JSON text to match the ones you saved in step 3 of Copy Credentials from QDS.
Click Update trust policy. This takes you back to the Summary page.
Copy the Role ARN.
Link AWS & QDS accounts
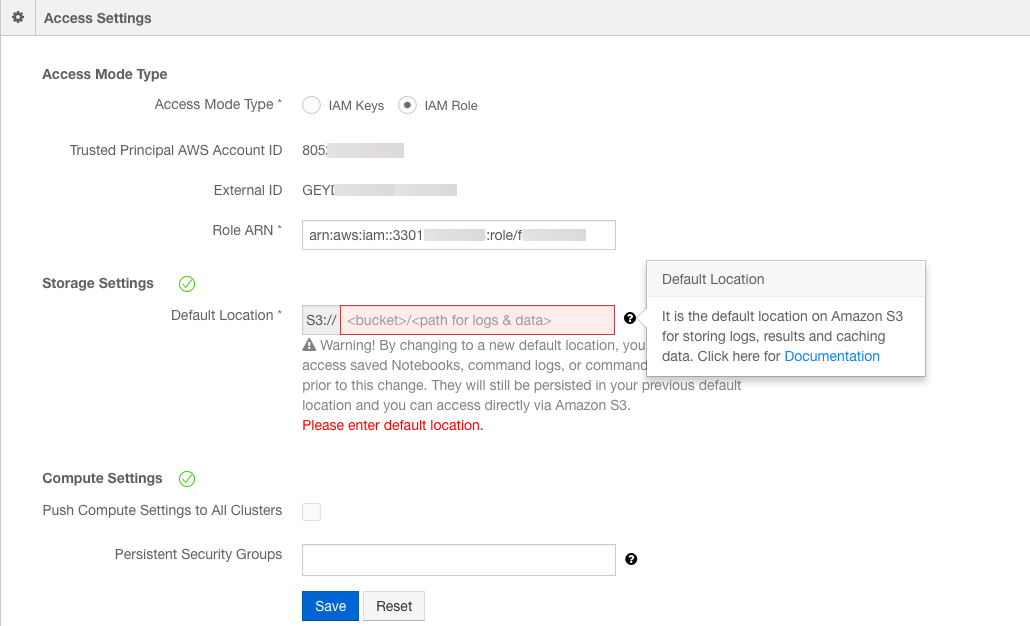
On the Home page, click Account Settings under Control Panel.
Scroll down to the Access Settings section and select IAM Role.
In the Role ARN field, paste the Role ARN that you copied in step 12 of the Create IAM Roles on AWS.
In the Default Location field, enter the Amazon S3 bucket path you had created and Save.
That’s it! Your account is set up. Run your first query.
Go back to Tabs.
Caution
Do not use words reserved by Qubole (such as qubole, qbol, Qubole, alias, and Name), while defining resources such as tags, security groups, and so on.
See Qubole Cluster EC2 Tags (AWS) for a complete list of words reserved by Qubole.