Scheduling Jupyter Notebooks
You can create a schedule to run Jupyter notebooks at periodic intervals without a manual intervention from the JupyterLab interface and Scheduler UI. After scheduling, you can view the list of schedules, run history, and output of the scheduled runs.
Note
This feature is available in the latest version of Jupyter Notebooks. Contact Qubole Support to migrate to the latest version of Jupyter Notebooks.
Note
You must have the access to create the Jupyter Notebook command to schedule Jupyter notebooks.
Creating a Schedule
Depending on whether you want to create a schedule from the JupyterLab interface or Scheduler UI, perform the appropriate actions:
From JupyterLab Interface
Select and open the required Jupyter notebook.
If you want to pass parameters from the Scheduler arguments, then designate a cell as a parameter cell. Select the appropriate cell, right-click to open the context menu, and select Set as parameters cell.
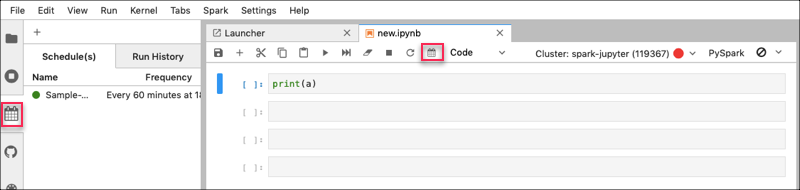
Click on the Scheduler icon on the left sidebar tab or on the top tool bar of the Jupyter notebook.
Click the ** + ** icon in the Scheduler context menu. The Scheduler UI opens in a separate tab.
Navigate to the Scheduler UI, and click the +Create button in the left pane.
Enter a name in the Schedule Name text field.
In the command field, select Jupyter Notebook from the drop-down list.
Select the required Jupyter notebook from the Select Jupyter Notebook drop-down list.
Select the required cluster from the drop-down list. Spark clusters running only Spark 2.2 and later versions are supported.
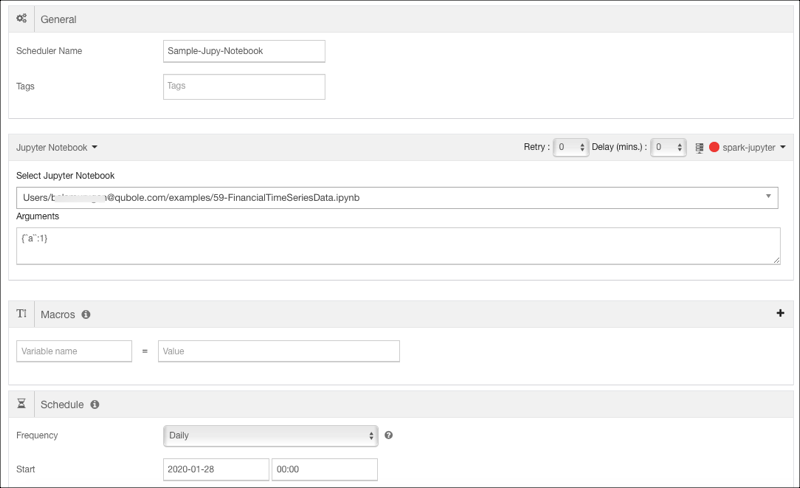
Optionally, enter the arguments and their values in a valid JSON format in the Arguments field.
If you designated a cell as a parameter cell in the Jupyter notebook, then the schedule parameters get injected after the designated cell.
If the Jupyter notebook does not contain any designated parameter cell, then the schedule parameters get injected into the first cell or the cell after the
%%configuremagic, if the%%configuremagic is used.To add details in the Macros, Schedule, and Advanced settings sections, see Creating a New Schedule.
Click Save.
The following figure shows a sample Scheduler UI for a Jupyter notebook.
The Scheduler runs the scheduled Jupyter notebooks at the specified schedule. The schedule run is viewable when at least one cell in the Jupyter notebook is executed. If the schedule run fails, verify the command logs.
If you click on Command ID, the output of the Jupyter notebook is displayed in a separate tab. If the associated cluster is down or the Jupyter interface is not accessible then the Command Logs are displayed in a separate tab. The output of notebook is read-only.
Viewing Schedules and Run History
For a Jupyter notebook, you can view the list of schedules and run history.
Open a Jupyter notebook from the left sidebar.
Click on the Scheduler icon either from the left sidebar tab or from the top toolbar of the Jupyter notebook. The left sidebar displays the Schedule(s) and Run History tabs as shown below.
To view the active schedules, click Schedule(s) tab. Double-click on the active schedule opens the Scheduler UI in a separate tab.
To view the output of a notebook, click Run History and double-click on the required run. Output of the notebook is displayed in a separate tab as shown below:
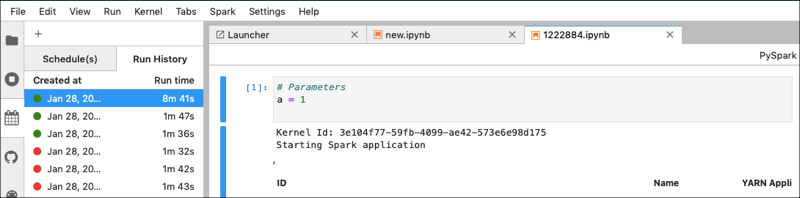
Hover on the schedules in the Run History to view details.